
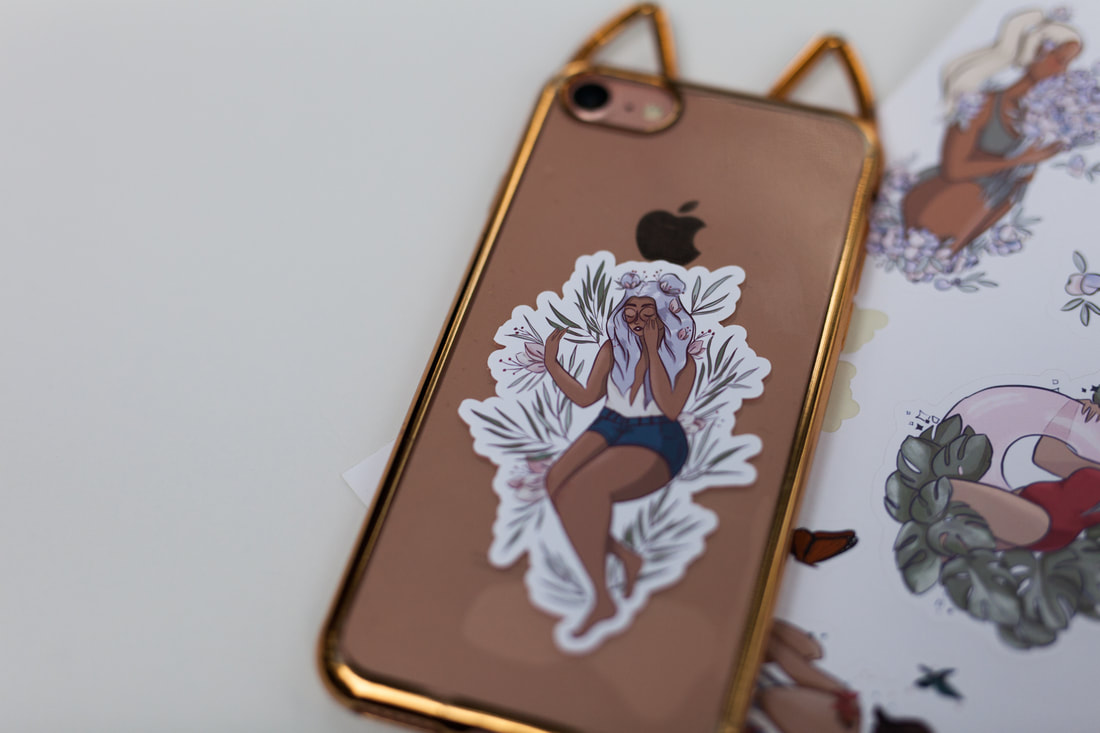
 I don't know about you guys, but I'm slightly obsessed with stickers. I have stickers on my laptop, water bottle, iPad, notebooks, calendar, phone, and any other blank surface I can think of. So of course when I started drawing more, I wanted to turn those pieces of art into stickers, and I think I have FINALLY figured out the best way to get super high quality stickers, made from my OWN artwork, right at home. Click the button below to see my latest illustrations, read more about the sticker making process and enter a free giveaway for your very own set of Summer Girls! 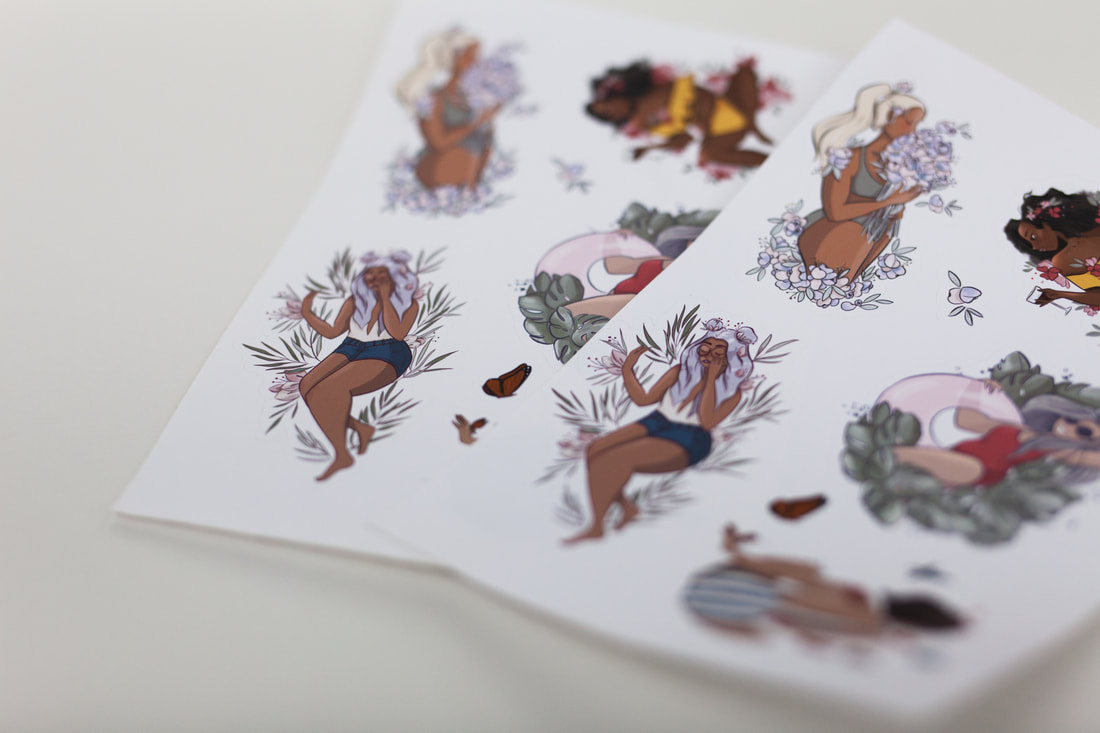 First, let's talk about the illustrations. Anyone who knows me knows I am not a fan of summer. It's hot, sticky, and I really love jackets, so this is not the season for me. This year, however, I decided to embrace it all by drawing some cute girls living their best summer lives. It didn't start out as a series, but I had so much fun with the first one I couldn't stop! Check out the slideshow below for all the illustrations! And if you're here for the giveaway and don't care about the tutorial, scroll all the way to the bottom for instructions on how to enter! I was so stoked about how these cuties turned out that when a couple followers on my Instagram mentioned turning them into stickers, I was on it. Through quite a bit of trial and error, I think I've finally figured out the best way to make weather-proof, die-cut stickers, right from home! Check out the tutorial below! What You'll Need: -Weather Proof Sticker Paper (I used the weatherproof matte sticker sheet from OnlineLabels.com) -Artwork/Clipart (but don't steal anyone else's artwork-not cool.) -Silhouette Cameo or other cutting machine -InkJet Printer 1. The first step is to draw your artwork! I drew mine on my iPad in Procreate but you can draw yours on paper and scan it in to you Silhouette Studio software just as easily 2. Get artwork into the Silhouette Studio and use the "Trace" tool to select your artwork (the yellow is what is selected, you can use the "Threshold" tool to select more or less). Then click "Trace and Detach" to remove the background 3. Select the artwork, including all that you want to be on the sticker, group it, and then click the "Offset" tool. Make sure that it makes one continuous line all the way around your sticker like the screenshot below. 4. Once you've filled up a page with your stickers, make sure you have the registration marks on, and send it to your printer! 5. After you've printed your stickers, put the page on the mat, and load it into your Cameo and get your settings correct on the software Tip: OnlineLabels.com has a fantastic guide to cutting settings for their materials (click here) and it's worked like a charm for me every time! 6. Send it to through your Cameo and voila! Stickers! Now put them everywhere! 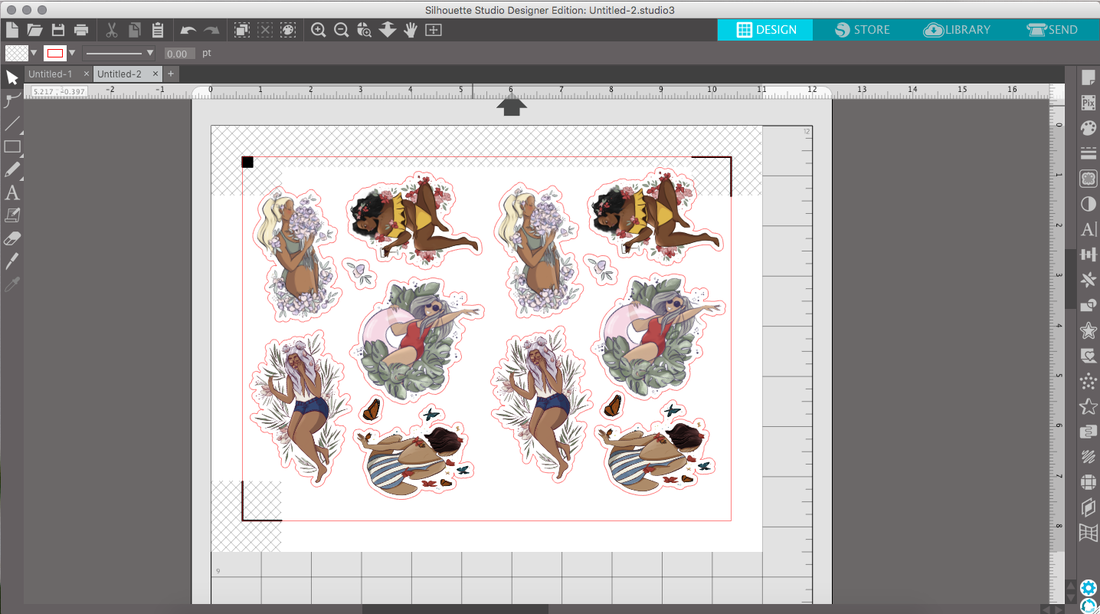 I'd love to see your stickers or hear your ideas for my next sticker pack! Leave a comment below or shoot me an e-mail. Let's chat!  If you want a chance to win a sticker sheet, you can enter one of three ways: 1. Leave a comment on this blog 2. Sign up for the newsletter or 3. Click the button to follow me on Instagram and leave a comment on your favorite Summer Girl! Giveaway ends on 07/26 so get to it!
2 Comments
Jenny Young
7/22/2018 12:20:37 pm
Love the blue striped swimsuit one. You are so very talented! 11/18/2019 04:30:13 pm
I want to enter this giveaway that you are trying to publish. I know that it is going to take some time before I can get the prize, but I am really hoping to win it all. I have a lot of things that I need to pay for, and this will really put a dent in it. I am not really a lucky person, but I can really feel that I can win it all. Please, notify me if I do. Leave a Reply. |

FWYWelcome to the ForeverWhitneyYoung Blog. Read on for recent projects and other fun stuff. Archives
November 2019
Categories
All
|
 RSS Feed
